
Understanding the Basics of Monitor Refresh Rates
When it comes to optimizing your digital experience, understanding the core principles discussed in "How to Unlock a Higher Refresh Rate on a Monitor (Hidden Settings)" is the first and most critical step. Your monitor's refresh rate, measured in Hertz (Hz), represents the number of times per second that the display updates with new images. For a long time, the standard across the industry was 60Hz. However, as technology has rapidly advanced into 2026, displays offering 120Hz, 144Hz, 240Hz, and even up to aggressive 500Hz limits have become increasingly accessible. To follow the instructions provided in this guide, you must first recognize that a higher refresh rate directly translates into smoother cursor movements, less ghosting during window dragging, and an overall snappier feel across the entire operating system, whether you are using Windows, macOS, or a dedicated Linux environment.
Many users purchase high-end monitors but continue to operate them at the default 60Hz setting because they simply don't know where to look. To fully leverage the capabilities of your hardware—and to avoid the common pitfalls highlighted when configuring your display—identifying the exact specifications of your monitor's panel is crucial. This step-by-step tutorial will ensure that your display is outputting the exact amount of frames your graphics card is generating, creating a seamless sync between your system components and your visual output.
Step-by-Step Instructions to Make the Change
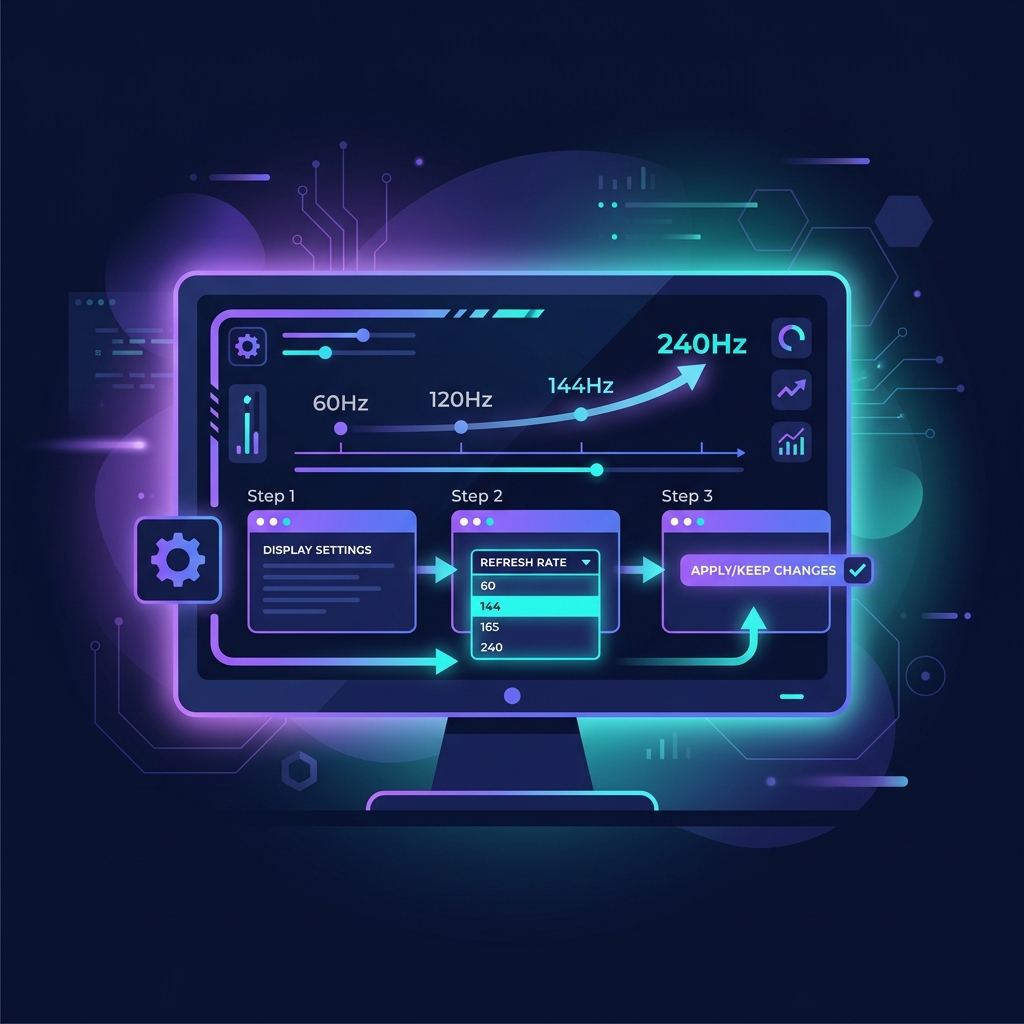
Now, let’s dive into the core process of "How to Unlock a Higher Refresh Rate on a Monitor (Hidden Settings)". The methodology varies slightly depending on whether you are running a Windows machine, a Mac device like a Mac Studio or Mini, or even an external display connected to a laptop or console. The underlying concept, however, remains universal: you must navigate to your operating system's advanced display properties.
- For Windows 11 Users: Right-click on your desktop and select "Display settings." Scroll down to the "Advanced display" section. Here, you will see a dropdown menu labeled "Choose a refresh rate." Select the highest available option. If your desired rate isn't showing, it might be due to cable bandwidth limitations or missing GPU drivers.
- For macOS Users: Click the Apple logo, go to "System Settings," and select "Displays." If your monitor supports multiple refresh rates, a dropdown menu will appear. If it is hidden, hold down the Option key while clicking "Scaled" to reveal the advanced refresh rate properties.
- For Gaming Consoles (PS5/Xbox Series X): Navigate to your console's video and display settings. Ensure that "120Hz Output" is set to "Automatic" or "On." Keep in mind that you must use an HDMI 2.1 cable connected to a compatible HDMI 2.1 port on your monitor or TV to unlock this feature at 4K resolution.
If you encounter a black screen or an "Out of Range" error after applying these changes, do not panic. Your computer will typically revert to the previous working resolution automatically within 15 seconds if you do not confirm the new setting. If the error persists, booting into safe mode to uninstall and reinstall your graphics drivers is the recommended troubleshooting path.
Common Troubleshooting and Hardware Limitations
It is not uncommon to follow all the steps in "How to Unlock a Higher Refresh Rate on a Monitor (Hidden Settings)" only to find that your monitor refuses to hit its advertised rating. Why does this happen? The primary suspect is usually your graphics processing unit (GPU) control panel properties, or an outdated connection standard. For instance, integrated graphics on older laptops simply lack the bandwidth to drive a 4K display at 120Hz. Furthermore, monitors with built-in overclocking features must often have this overdrive mode manually activated directly via the physical buttons located on the back or bottom bezel of the monitor before the operating system will even recognize the higher refresh rate threshold.
Another crucial factor is dealing with multiple monitors. Sometimes, mixing a 60Hz secondary display with a 144Hz primary display can cause subtle stuttering or force the higher refresh rate down to match the lowest common denominator when hardware acceleration is taxed. Ensuring your primary GPU drivers (NVIDIA Control Panel or AMD Adrenalin) are fully updated is the single best way to mitigate these erratic multi-monitor syncing issues.
Why This Upgrade Will Change Your Daily Routine
By successfully executing the steps outlined in "How to Unlock a Higher Refresh Rate on a Monitor (Hidden Settings)", the immediate visual relief is undeniable. The moment you move your mouse across the desktop, the cursor will glide with a buttery fluidity that makes returning to 60Hz feel incredibly sluggish. Scrolling through long documents, web pages, and heavy spreadsheets becomes drastically easier on the eyes, significantly reducing ocular fatigue during extended eight-hour work shifts.
Ultimately, ensuring your monitor is correctly configured isn't solely about gaming dominance; it’s about visual ergonomics. Your display is the primary bridge between you and your computer. Taking the five minutes required to verify and apply these hidden settings is arguably the greatest free performance upgrade you can perform, yielding immediate dividends in both productivity and leisure.